
The Honeywell TH5220D1003 is a programmable thermostat designed for gas unit heaters, offering precise temperature control and energy efficiency. It features a digital display and compatibility with various heating systems. This manual provides essential installation and operation guidelines for installers and users to ensure safe and effective use.
1.1 Overview of the Honeywell TH5220D1003 Thermostat
The Honeywell TH5220D1003 is a programmable thermostat designed for gas unit heaters, offering precise temperature control and energy efficiency. It features a digital display, compatibility with various heating systems, and a user-friendly interface. This thermostat is ideal for residential and light commercial applications, providing reliable performance and flexibility. The manual includes detailed instructions for installation, wiring, and programming, ensuring safe and proper setup. Designed to meet modern heating needs, the TH5220D1003 combines simplicity with advanced functionality, making it a popular choice for homeowners and professionals seeking efficient temperature management solutions.
1.2 Key Features and Benefits
The Honeywell TH5220D1003 offers a range of features that enhance comfort and efficiency. It includes a digital display for clear temperature control, programmable settings for customized heating schedules, and compatibility with gas unit heaters. The thermostat supports both heating and cooling systems, providing versatile temperature management. Its energy-efficient design helps reduce utility bills, while the easy-to-use interface simplifies programming. Additionally, it includes safety features like electrical hazard precautions and proper disposal guidelines. These features make the TH5220D1003 a reliable and cost-effective solution for managing heating systems effectively.
1.3 Important Safety Precautions
Before installing the Honeywell TH5220D1003, ensure all power to the heating system is turned off to avoid electrical shock. Handle the thermostat and its components with care to prevent damage. Follow all local regulations for proper disposal of old thermostats and packaging materials. Avoid touching electrical components without proper insulation. Keep wires organized to prevent short circuits. Ensure the system is compatible with the thermostat to maintain safety and efficiency. Always refer to the manual for specific guidelines tailored to your system type. Adhere to these precautions to ensure a safe and successful installation process.
Pre-Installation Preparation
Verify system compatibility, gather tools like screwdrivers and wire strippers, and review wiring diagrams to ensure a smooth installation process for the Honeywell TH5220D1003 thermostat.
2.1 Checking System Compatibility
Before installing the Honeywell TH5220D1003, ensure compatibility with your heating system. It works with gas unit heaters, HD/HDB, and HDS/HDC models. Verify voltage requirements and wiring configurations to match your system. Check if your system supports the thermostat’s features, such as manual or auto changeover modes. Refer to the user manual or manufacturer’s guidelines for specific compatibility details. Proper system alignment ensures efficient performance and avoids installation issues.
2.2 Gathering Necessary Tools and Materials
To ensure a smooth installation, gather essential tools and materials beforehand. You will need a screwdriver (both Phillips and flathead), wire strippers, pliers, and a voltage tester. Additionally, collect materials like wall anchors, mounting screws, and extra wire nuts. For safety, wear protective gear such as safety glasses and gloves. Ensure you have the thermostat unit, wall plate, and all included hardware. Refer to the wiring diagram from the manual to prepare the necessary wires. Organizing these tools and materials in advance will streamline the installation process and minimize downtime.
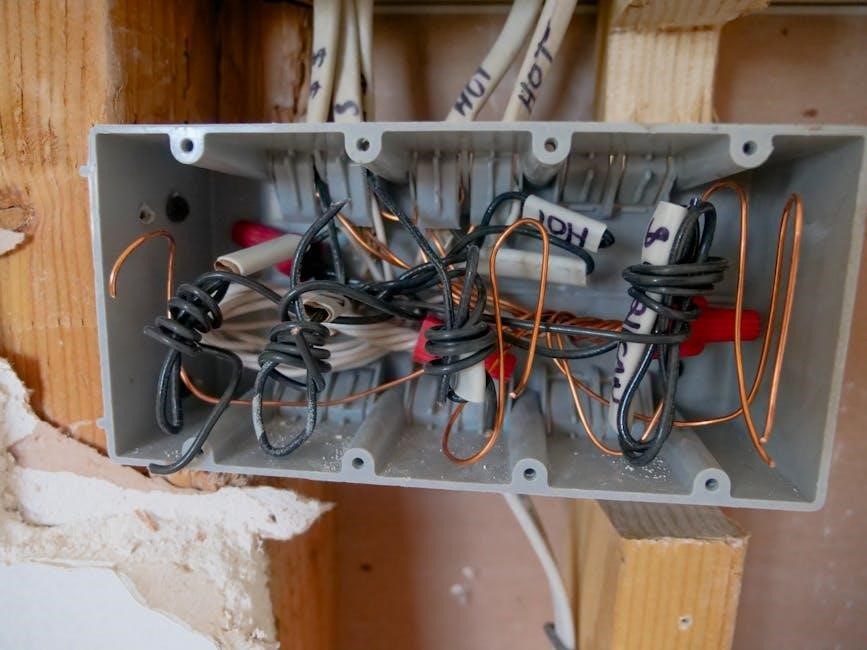
2;3 Understanding the Wiring Diagram
Before installation, carefully review the wiring diagram provided in the manual to ensure compatibility with your system. Label existing wires to match the thermostat’s terminals (e.g., R, W, Y, G, C). Verify the system type (e.g., gas heater, heat pump) and ensure the wiring corresponds to the thermostat’s requirements. If unsure, consult the diagram for specific configurations. Always disconnect power before handling wires to avoid electrical hazards. This step is critical for proper installation and safe operation. Miswiring can lead to system malfunctions or safety risks, so double-check connections before proceeding.
Installation Instructions
Mount the wall plate, connect wires according to the wiring diagram, and install the thermostat. Follow safety guidelines, ensure proper alignment, and secure all components tightly for reliable operation.
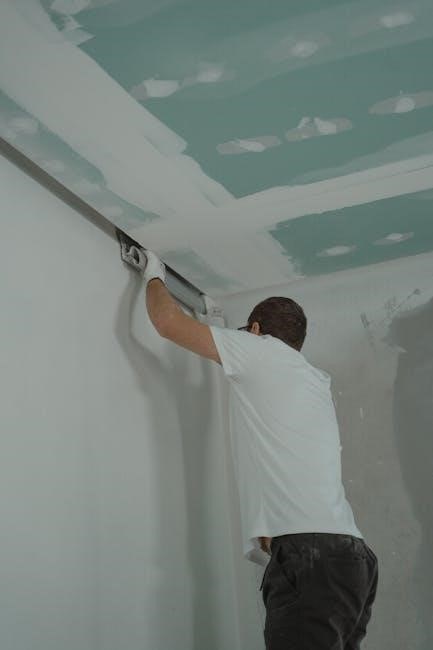
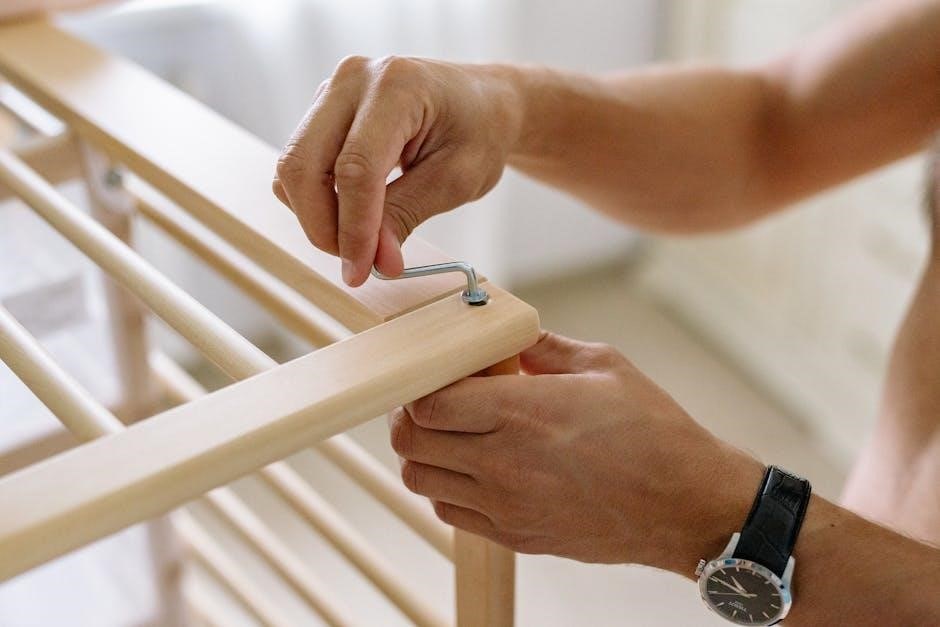
3.1 Mounting the Wall Plate
Begin by preparing the area where the wall plate will be installed. Ensure the surface is clean and dry. Use the provided template or the wall plate itself to mark the screw holes. Drill pilot holes if necessary, then screw the wall plate securely into place. Align it straight using a level to ensure proper installation. If replacing an old thermostat, check the position against the previous mounting for consistency. Make sure the wall plate is compatible with your system and follows the manufacturer’s guidelines for spacing and alignment. This step is crucial for the thermostat’s stability and functionality. Always follow safety precautions and manufacturer instructions.
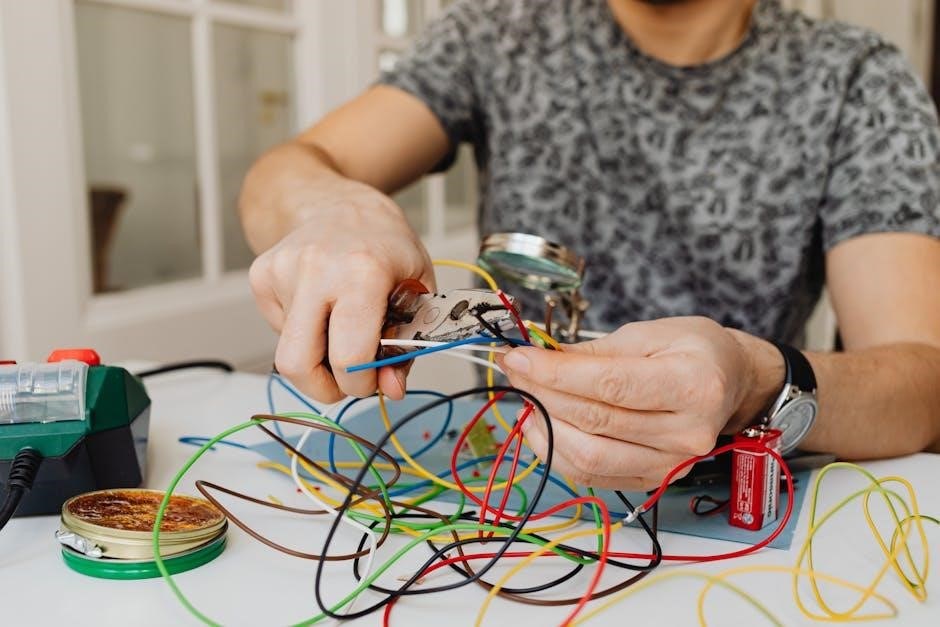
3.2 Connecting the Wires
Connecting the wires is a critical step in the installation process. Always refer to the wiring diagram provided in the manual to ensure correct connections. Start by turning off the power to the heating/cooling system at the circuit breaker. Identify each wire by its color and label, matching them to the corresponding terminals on the thermostat. For example, the R wire connects to the Rh or Rc terminal, while the W wire connects to the heating terminal. Securely attach the wires to the terminals using wire nuts or connectors. Ensure no wires are loose or crossed to avoid malfunctions. After connecting, gently tuck the wires into the wall plate to keep them organized. Double-check all connections for accuracy before proceeding. If unsure, consult a licensed electrician to avoid electrical hazards.
3.3 Installing the Thermostat
After connecting the wires, carefully install the thermostat onto the wall plate. Ensure the device is level and securely attached using the provided screws. Gently snap the thermostat into place, making sure it clicks firmly onto the wall plate. Once installed, turn the power back on at the circuit breaker. Allow the thermostat to power up and complete its self-test. Set the time, date, and basic parameters as needed. Verify that all buttons and controls function properly. If the display lights up and responds to inputs, the installation is complete. Refer to the programming section for further setup instructions.
3.4 Final Installation Checks
After completing the installation, perform a series of final checks to ensure everything functions correctly. Turn the power back on at the circuit breaker and test all thermostat functions, including heating, cooling, and fan modes. Verify that the display lights up and responds to button presses. Check for proper wire connections and ensure there are no loose wires. Test the thermostat’s ability to switch between modes and adjust temperatures. If any issues arise, consult the troubleshooting section or the installation manual for guidance. Ensure all safety precautions have been followed and the system operates safely and efficiently.

Wiring and Electrical Connections
This section covers safe wiring practices for the Honeywell TH5220D1003, ensuring compatibility with systems like HD/HDB heaters. Follow the wiring diagram carefully and disconnect power before starting connections to avoid electrical hazards.
4.1 Preparing the Wires
Before installing the Honeywell TH5220D1003, ensure all wires are properly labeled and matched to their respective terminals. Disconnect power to avoid electrical hazards. Use the provided wiring diagram to identify compatible connections for systems like HD/HDB heaters. Label each wire (R, W, Y, G, etc.) to maintain clarity. Remove the old thermostat carefully, noting existing connections. Secure any unused wires and organize them neatly. Use the UWP Universal Mounting Plate to cover old marks. Double-check all connections before restoring power to ensure safety and proper functionality.
4.2 Connecting the Thermostat to the Heating/Cooling System
Connect the Honeywell TH5220D1003 thermostat to your heating/cooling system by matching the wires to the appropriate terminals (R, W, Y, G, etc.). Refer to the wiring diagram for accurate connections. Ensure the system type (e.g., gas heater, heat pump) is correctly set in the installer menu. Use the UWP Universal Mounting Plate if needed to cover old thermostat marks. Secure all wires firmly to prevent loose connections. Double-check the wiring against the manual to avoid mismatches. Once connected, restore power and test the system to ensure proper operation. Always follow safety guidelines to prevent electrical hazards.
4.3 Testing the Electrical Connections
After connecting the wires, turn off the power to the heating/cooling system at the circuit breaker. Use a voltage tester to ensure no live voltage is present. Refer to the wiring diagram to verify all connections match the correct terminals (e.g., R, W, Y, G). Turn the power back on and test the thermostat by running a full heating and cooling cycle. Check for proper operation of the system, ensuring the thermostat accurately controls the temperature. If any issues arise, double-check the connections and consult the manual for troubleshooting steps. Always prioritize safety when working with electrical systems.
Programming the Thermostat
Programming the Honeywell TH5220D1003 allows you to set temperature schedules, optimizing comfort and energy efficiency. Use the digital interface to configure heating/cooling cycles and preferences easily.
5.1 Setting Basic Parameters
Setting basic parameters on the Honeywell TH5220D1003 involves configuring fundamental settings like temperature ranges, time formats, and system modes. Users can choose between Fahrenheit or Celsius for temperature display. The thermostat also allows setting the current time and date, which is essential for scheduling. Additionally, basic parameters include selecting the system type, such as heat pump or gas heater, to ensure compatibility. These settings lay the foundation for advanced programming and must be accurately configured to ensure proper thermostat operation and efficiency.
5.2 Configuring Advanced Settings
Configuring advanced settings on the Honeywell TH5220D1003 allows for customized system performance. Users can adjust temperature differential settings to minimize cycling and optimize comfort. Additional features include configuring the swing setting for smoother temperature transitions and enabling multi-stage heating for systems with multiple heat sources. Advanced settings also allow for setting up auxiliary heat sources and adjusting the thermostat’s response time. These configurations enhance energy efficiency and system reliability, ensuring the thermostat operates in harmony with the connected heating or cooling system for optimal performance and user satisfaction.
5.3 Understanding the Menu Navigation
Navigating the Honeywell TH5220D1003 thermostat menu is straightforward, with clear prompts guiding users through settings. The menu includes options for scheduling, system settings, and advanced features. Users can cycle through menu items using the navigation buttons and select options with the “Select” button. Key menu sections include temperature settings, scheduling, and system configuration. The digital display provides clear feedback, ensuring ease of use. Understanding the menu structure allows users to fully customize their thermostat settings, optimizing performance and energy efficiency for their specific needs.
Troubleshooting Common Issues
Check wiring connections, ensure power is on, and verify system compatibility. Review programming settings and reset if necessary. Consult the manual or contact support for unresolved issues.
6.1 Identifying Common Installation Errors
Common installation errors include incorrect wiring connections, improper mounting of the wall plate, and failure to disconnect power before starting. Additionally, compatibility issues with the heating/cooling system or incorrect thermostat settings can cause malfunctions. Ensure all wires are securely connected and match the system requirements. Verify that the thermostat is compatible with your heating system type. Always follow the installation manual’s guidelines and disconnect power before handling any electrical components. If issues persist, refer to the troubleshooting section or contact Honeywell support for assistance.
6.2 Resolving Wiring Issues
- Ensure all wires are securely connected to the correct terminals as per the wiring diagram.
- Verify system compatibility and wire labels to prevent incorrect connections.
- Turn off power at the circuit breaker before handling any wires to avoid electrical shock.
- Use a multimeter to test for short circuits or open wires in the system.
- Check for loose connections or damaged wires that may cause malfunctions.
- Refer to the installation manual for specific wiring configurations and guidelines.
6.3 Addressing Programming Problems
If the thermostat fails to respond to programmed settings, restart the device and ensure proper power supply. Check for software updates and install the latest version if available. Verify that all programmed parameters, such as temperature setpoints and scheduling, are correctly configured. Consult the user manual for navigation tips and troubleshooting steps. If issues persist, perform a factory reset and reprogram the thermostat. For advanced problems, contact Honeywell customer support for technical assistance or refer to the troubleshooting section in the manual.
Maintenance and Upkeep
Regularly clean the thermostat’s display and sensors to ensure accurate temperature readings. Replace batteries as needed and check for software updates to maintain optimal performance.
7.1 Cleaning the Thermostat
Cleaning the Honeywell TH5220D1003 thermostat is essential for maintaining its functionality. Use a soft, dry cloth to gently wipe the display and exterior. Avoid harsh chemicals or liquids, as they may damage the device. For deeper cleaning, lightly dampen the cloth with water, ensuring no moisture seeps inside. Regular cleaning prevents dust buildup, which can affect temperature accuracy. Always power down the thermostat before cleaning to prevent electrical issues or accidental settings changes; This simple maintenance step ensures long-term reliability and optimal performance of your thermostat.
7.2 Updating Software (If Applicable)
Periodically, check for software updates for the Honeywell TH5220D1003 thermostat to ensure optimal performance. Updates may enhance features, fix bugs, or improve compatibility. Refer to the user manual or Honeywell’s official website for specific instructions. Typically, updates are downloaded via a computer or mobile app and transferred to the thermostat. Ensure the device is powered on and connected during the update process. Never interrupt the update, as it may cause system malfunctions. After completion, restart the thermostat to apply changes. Regular software updates ensure your thermostat operates efficiently and remains up-to-date with the latest advancements.
7.3 Regular System Checks
Perform regular system checks on the Honeywell TH5220D1003 thermostat to maintain optimal functionality. Inspect the wiring for any signs of wear or damage, ensuring all connections are secure. Check the display for clarity and responsiveness, and verify that temperature readings are accurate. Test the heating and cooling system operation to ensure the thermostat is controlling them correctly. Additionally, review the programmed settings to confirm they align with your energy usage goals. Address any issues promptly to prevent system inefficiencies or potential failures. Regular checks help extend the lifespan of your thermostat and ensure reliable performance year-round.
Appendix
This section provides technical specifications, warranty details, and support contact information for the Honeywell TH5220D1003 thermostat, ensuring comprehensive reference for installation and troubleshooting needs.
8.1 Technical Specifications
The Honeywell TH5220D1003 thermostat operates on 24V AC and is compatible with gas unit heaters. It features a digital display for precise temperature control. The thermostat includes terminals for R, W, Y, G, C, and O connections, supporting various heating systems. It is designed for use with single-stage heating systems and requires a 24V transformer. The product dimensions are 4.5 inches in height and 2.75 inches in width. It is UL-certified and complies with safety standards. The thermostat includes a 1-year limited warranty and operates in temperatures between 32°F and 90°F (0°C to 32°C).
8.2 Warranty Information
The Honeywell TH5220D1003 thermostat is backed by a limited 1-year warranty covering defects in materials and workmanship. The warranty applies to the original purchaser and is non-transferable. It excludes damage caused by improper installation, misuse, or failure to comply with instructions. The battery is not included in the warranty. For warranty claims, contact Honeywell’s customer support. The manufacturer reserves the right to repair or replace defective units. Refer to the warranty certificate for full terms and conditions. This warranty underscores Honeywell’s commitment to product quality and customer satisfaction.
8.3 Contact Information for Support
For assistance with the Honeywell TH5220D1003 thermostat, contact Honeywell’s customer support team. The toll-free number for US customers is 1-800-468-1502. International customers can reach support at 1-602-436-2800. Visit the official Honeywell website at www;honeywellhome.com for more resources or to submit an inquiry. Email support is available at customersupport@honeywell.com. Representatives are available Monday-Friday, 8 AM-5 PM CST, to address installation, programming, or troubleshooting issues. Honeywell is committed to providing reliable support for optimal product performance and user satisfaction.